Quantcast
Channel: The Sisters Cafe
Viewing all 10 articles
Browse latest View live

Perfectly wonderful Cinnamon Rolls

$
0
0
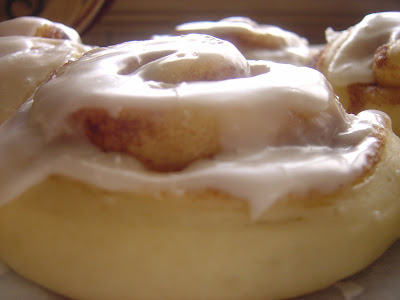
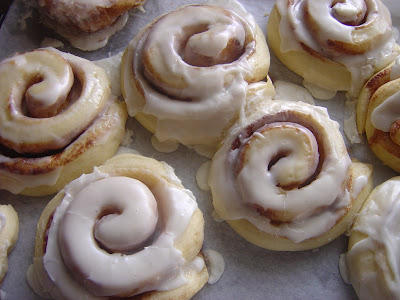
This is the best cinnamon roll recipe!! I just love it and have been using it for years. It makes lots, so it has been perfect for bridal and baby shower brunches, family gatherings or anytime you need a lot!! Whenever I make these we give plates away to our friends and neighbors and always have plenty for our family too. I usually make them in the morning and they are warm out of the oven by afternoon for an after school snack or dinner time (they are really yummy for dinner with a hearty stew or chili in the winter or a salad in the summer). I have also made them before I go to bed and then set them on top my freezer in the garage to rise all night. Then I just pop them in the oven in the morning. Do not overbake them! They are just barely golden when they are done–so don’t expect them to be too browned. Also, I place mine on a cookie sheet spaced apart, not touchig. These really are amazingly delicious! Mmmmm–soooo good!!
Perfectly wonderful Cinnamon Rolls
Author: 
 
Ingredients
  • 2 c. milk
  • 2 cubes butter (1 cup)
  • 2 pkg yeast (4 ½ tsp)
  • ⅓ c. warm water
  • 1⅓ c. sugar
  • 1 tsp salt
  • 4 beaten eggs
  • 8-9 c. flour
Filling:
  • ½ cup softened butter (1 cube)
  • Granulated Sugar
  • Cinnamon (lots)
Butter Cream Glaze:
  • ½ cup softened butter (1 cube)
  • 1 tsp vanilla
  • dash of salt
  • dash of cream of tarter
  • 1½ lbs powdered sugar
  • scalded milk or cream
Instructions
  1. Heat milk and 2 squares of butter together until butter is melted. Cool and set aside. (Or, melt butter separately and add to warmed milk so the mixture is not so hot and doesn't have to cool so long.) Mix yeast and warm water; let stand 5 minutes. Add cooled milk, 1⅓ c. sugar, 1 tsp salt, 4 beaten eggs. Add 4 c. flour and mix and gradually add 4 additional cups flour. You may have to add extra flour after 8 cups - just add a little at a time if needed to get the right consistency so the dough can be handled. However, you may be fine with 8 cups. Dough should be firm but sticky. Cover with cloth and put in a warm place, and raise 1 ½ to 2 hours. Dough should nearly be doubled in size. Divide dough in half and empty onto floured surface and knead a little. Roll dough into rectangle, about ½ inch thick. (Do not roll it out too thin.) To this half of dough, spread on ½ square of softened butter, completely covering dough. Then sprinkle a coating of sugar over entire piece of dough. Then a layer of cinnamon. Be generous with the cinnamon; this is what makes it tasty. Roll into long roll, pinch edges together and slice with dental floss. Place on a cookie sheet covered with a silpat or parchment paper. Do same thing to second half of dough. Cover with a clean dishtowel (or saran wrap sprayed with cooking spray) and put in warm place, free of drafts, for 2 to 5 hours to raise--just depends-but the should be double in size. Bake at 350° for 10 minutes or until barely browned. Remove from oven and let set for 5 minutes. Drizzle with glaze while still warm. Makes 3-4 dozen.
Glaze Instructions:
  1. Add all together...adding milk a little at a time, alternately with the powdered sugar until desired consistency is reached. For cinnamon rolls, it needs to be a little thinner than regular icing.
 

Pumpkin Spice Rolls

$
0
0

 Something about this time of year puts me in the mood for pumpkin! Pumpkin is defenitly a favorite at my house every Fall:)   Lately I have been making our favorite pumpkin muffins, the best sweet pumpkin bread , pumpkin pancakes and even trying some new recipes like this one.  A long time ago I had some incredibly good pumpkin rolls at a restaurant and so of course, I wanted the recipe!  Ever since then,  I have kept my eye out for pumpkin roll recipes.  I have tried several over the years with just OK results until happily I tried this recipe and they turned out to be FANTASTIC!  I think they are even better than the ones I had years ago!  Seriously these are so good!  I love how moist and tender they are and perfectly spiced!  I am thinking that these would be fantastic with a warm bowl of soup and Grandma‘s famous honey butter!  Yum!


Pumpkin Spice Rolls
Author: 
 
Ingredients
  • 4 tsp active dry yeast, or approximately 2 envelopes
  • ¼ cup milk
  • 5¼ cups all-purpose flour
  • 1½ tsp cinnamon
  • 1 tsp ground ginger
  • ¼ tsp ground cloves
  • ¼ tsp ground cardamom
  • ⅓ cup brown sugar
  • 1½ tsp salt
  • 2 large eggs
  • ¼ cup melted butter
  • 1¾ cup pumpkin puree, or a 15 oz can of pure pumpkin
  • egg wash (1 egg lightly beaten with 1 tbsp of water)
Instructions
  1. Heat milk to between 110 and 115 degrees (feels slightly warm on the back of your hand) on the stove or in the microwave and pour into the bowl of your stand mixerl; stir in the active dry yeast, and let stand for at least 5 minutes. Meanwhile, in a large bowl, combine the first 6 ingredients, and mix well. In a separate large bowl, lightly beat the two eggs, then stir in the melted butter, and the pumpkin puree. After the yeast has been activated, add the wet indgredients directly into the bowl of your stand mixer, and stir to combine. Then add ½ of the dry ingredients (flour and spices) from the other large bowl, and stir to mix the dry and wet ingredients together. After it is well mixed, add the remaining ½ of the dry ingredients and mix again. Using the dough hook, allow your machine to knead the dough for you until it is smooth and still somewhat sticky (3-5 minutes). Transfer the dough to a lightly oiled bowl, and cover to let rise for approximately 1 hour (it will double in size). Then, remove the dough from the bowl, place it on a lightly floured surface. Lightly grease an bar pan cookie sheet or 2 8-9 inch pans. Working.with ½ of the dough, cut off 9-12 evenly sized portions (depending on how big you want them) and roll them into balls that can fit into your palm (they don't need to be perfectly round. Space them in the pan so they are just barely touching the sides of one another; they will expand during the second rising time and during baking to completely fill the pan.
  2. Makes 18-24 rolls (the size pictured is 18 rolls)
  3. If you would prefer you could make 2 Braided loaves (or 9 rolls and 1 braided loaf) using the same method as Challah Bread directions (link to the recipe is below)
  4. After your dough is shaped, cover it loosely, and let it rise for another 1-1½ hours. Meanwhile, preheat your oven to 350 . Once your bread is ready to bake, brush the top lightly with the egg wash, and sprinkle dinner rolls with chopped nuts or pepitas if desired. Bake bread for approximately 30-35 minutes, until browned, or until an instant read thermometer inserted in center reads 190 degrees. Remove the bread from the oven and allow to cool on a rack.

Recipe Source:  Slightly adapted from Sweet Peas Kitchen via The Cilanthropist

My Favorite Gingersnaps

$
0
0

20141211_202214

I have to admit that I have already made 3 batches of these this month!  Every time we have needed a treat to bring somewhere I have opted for these gingersnaps and they are always a big hit!  This is the BEST recipe in my opinion!  Gingersnaps remind me of my Grandma who I love and they are also my husband’s favorite cookie–so I guess that explains their popularity with me:)  Also, baking these cookies makes your house smell divine!  This recipe is all butter (no shortening–I do my best to avoid that stuff) and just the right amount of spices.  They have a crispy exterior but a chewy flavorful inside.  Perfection, I tell you!

I made these cookies as a treat to enjoy after I took my boys to the Nutcracker:)  Can you believe I got all my sports loving boys to dress up and go the ballet with me?!  Let me tell you I was pretty proud of myself!  We have fun!

So tell me, what is your go to favorite holiday treat?

FYI–some people have been confused with our new design–but the comment button is up there at the top of the posts now:)

My Favorite Gingersnaps
Author: 
 
Ingredients
  • •1½ cups butter, softened
  • •2 cups sugar
  • •1/2 cup molasses
  • •2 eggs
  • •4 cups all-purpose flour
  • •4 tsp. baking soda
  • •2 tsp. cinnamon
  • •1 tsp. ginger
  • •1 tsp. salt
Instructions
  1. Preheat oven to 375 degrees.
  2. In a separate bowl, whisk together flour, soda, cinnamon, cloves, ginger and salt and set aside.
  3. In the bowl of an electric stand mixer, beat together butter and sugar on medium speed for 1 minute until light and fluffy. Add in the eggs and molasses, and beat on medium-low speed until combined. Gradually add in the dry ingredient mixture and beat until combined.
  4. Roll the dough into small balls, about 1-inch in diameter. Fill a small bowl with sugar, and roll each ball in the sugar until it is completely coated. Place on cookie sheet at least 1 inch apart, and bake for about 8-10 minutes, until the cookies begin to slightly crack on top. (They may crack more while cooling.) Remove from the oven and let cool for a minute or two. Then transfer to wire racks to cool completely.
  5. Serve immediately or store in a sealed container for up to 1 week.
Recipe Source: slightly adapted from my Grandma Rice (butter instead of shortening)

Pumpkin Cream Cheese Muffins

$
0
0

Pumpkin Cream Cheese Muffins

Hello sweet friends!  Are you enjoying your Fall so far?  On my last post I mentioned that it was finally getting chilly here in the South, well that is no longer the case!  I think Mother Nature is being very tricky this year!  We have actually been breaking records here in Chattanooga this last week.  It was 85 yesterday, a new hottest November day on record for us!  I  have to admit that I find this irritating, especially when I keep trying to wear my normal Fall wardrobe favorites of long sleeves and boots.   I guess I can’t be too mad though, because it really is GORGEOUS here with all the Autumn colors.  I love it, and I am holding out hope that the elusive ‘chill in the air’ will come soon!  Oh well, at least the heavy humidity is gone, and trust me, that is something to cheer about!  Even though may it may feel like summer outside,  I have not let it stop me from baking some favorites for this time of year, including these wonderful Pumpkin Cream Cheese Muffins.  These are amazing and they make your house smell incredibly fall-ish!  These babies are definitely ‘taking it up a notch’ kind of muffins.  They are a bit more work with the cream cheese filling and the crumb topping but totally worth it!   You will love them!

PS I had several emails asking about our email sign up.  For some reason it was missing off our sidebar, but it is back now!

Pumpkin Cream Cheese Muffins
Author: 
Serves: 24 muffins
 
Ingredients
For the filling:
  • 8 oz. cream cheese, softened
  • 1 cup powdered sugar
For the muffins:
  • 3 cups all-purpose flour
  • 2 teaspoon ground cinnamon
  • 1 teaspoon ground nutmeg
  • 1 teaspoon ground cloves
  • 1 teaspoon salt
  • 1 teaspoon baking soda
  • 4 large eggs
  • 2 cups sugar
  • 1 15 ounce can of Pumpkin puree
  • 1¼ cups vegetable oil (I use ½ cup applesauce and ¾ cup oil)
For the topping:
  • ⅓ cup brown sugar
  • 5 tablespoons flour
  • 1½ teaspoons ground cinnamon
  • 4 tablespoons cold unsalted butter, cut into pieces
Instructions
To prepare the filling:
  1. Combine the cream cheese and powdered sugar in a medium bowl and mix well until blended and smooth.
To make the muffins:
  1. Preheat the oven to 350 degrees F. Line muffin pans with paper liners. In a medium bowl, combine the flour, cinnamon, nutmeg, cloves, salt and baking soda; whisk to blend. In the bowl of an electric mixer combine the eggs, sugar, pumpkin puree, applesauce (if using) and oil. Mix on medium-low speed until blended. With the mixer on low speed, add in the dry ingredients, mixing just until incorporated.
To make the topping:
  1. Combine the sugar, flour and cinnamon in a small bowl; whisk to blend. Add in the butter pieces and cut into the dry ingredients with a pastry blender or two forks until the mixture is coarse and crumbly.
To assemble the muffins:
  1. Using a cookie scoop or spoon, fill 24 muffin cups with a small amount of batter, enough to cover the bottom of the liner (2 tablespoons). Using a smaller mini scoop, or small spoon place about a tablespoon dollop of the cream cheese mixture in the center of each muffin cup. You want to put the cream cheese in the lower portion of the muffin because it will rise during the baking process. Divide the remaining pumpkin batter evenly among the muffin cups, covering the cream cheese completely. Sprinkle a small amount of the crumb topping mixture over each of the muffin.
  2. Bake for 20-25 minutes. Transfer to a wire rack and let cool completely before serving. They are excellent to serve warm, cold, or at room temperature.

Recipe Source: adapted from Annie Eats

Favorite Christmas Recipe Round Up

$
0
0

Merry Christmas sweet friends!

Can you believe it is less than a week until Christmas?!  I am so excited!  I have a couple of little things left to get but then I am DONE and can focus on fun at home!  I am especially looking forward to some kitchen time, making our favorite holiday recipes with my boys.  I thought I would share my list of favorite Christmas recipes with you today, in case you wanted to add a few to your list too!

Candy:

Grandma’s Famous Caramels


Oreo Truffles

Triple Chocolate covered Nuts

Pretzel Rolo Treats (my little boys favorite–we make them gluten free)

Almond Roca /English Toffee (my favorite recipe coming soon)

Cookies:

Gingersnaps (I normally use my gingersnap recipe for gingerbread men)

Eggnog Thumbprints

Twix Cookies (coming soon)

Favorite Sugar Cookies (including an awesome Gluten Free one, recipe coming up)

Baking:

Eggnog Muffins

Cinnamon Rolls (gifting to neighbors)

Appetizers:

Buchanan Cheese Ball

Sweet Cherry Cheese Ball (trust me on this one–even if you don’t like marshino cherries–you will love this!)

Christmas Dishes:

Christmas Eve Egg Nog (this is a tradition that we all look forward to–it is the BEST served in a chilled punchbowl over scoops of vanilla bean ice cream!)

Chicken A La King (served in bread crowns on Christmas Eve for Christ the King!)

Christmas Morning Eggs (a little cream works MAGIC on eggs!)

What are you making?  Anything I need to add to my list?


My Favorite Gingersnaps

$
0
0

20141211_202214

I have to admit that I have already made 3 batches of these this month!  Every time we have needed a treat to bring somewhere I have opted for these gingersnaps and they are always a big hit!  This is the BEST recipe in my opinion!  Gingersnaps remind me of my Grandma who I love and they are also my husband’s favorite cookie–so I guess that explains their popularity with me:)  Also, baking these cookies makes your house smell divine!  This recipe is all butter (no shortening–I do my best to avoid that stuff) and just the right amount of spices.  They have a crispy exterior but a chewy flavorful inside.  Perfection, I tell you!

I made these cookies as a treat to enjoy after I took my boys to the Nutcracker:)  Can you believe I got all my sports loving boys to dress up and go the ballet with me?!  Let me tell you I was pretty proud of myself!  We have fun!

So tell me, what is your go to favorite holiday treat?

FYI–some people have been confused with our new design–but the comment button is up there at the top of the posts now:)

My Favorite Gingersnaps
Author: 
 
Ingredients
  • •1½ cups butter, softened
  • •2 cups sugar
  • •1/2 cup molasses
  • •2 eggs
  • •4 cups all-purpose flour
  • •4 tsp. baking soda
  • •2 tsp. cinnamon
  • •1 tsp. ginger
  • •1 tsp. salt
Instructions
  1. Preheat oven to 375 degrees.
  2. In a separate bowl, whisk together flour, soda, cinnamon, cloves, ginger and salt and set aside.
  3. In the bowl of an electric stand mixer, beat together butter and sugar on medium speed for 1 minute until light and fluffy. Add in the eggs and molasses, and beat on medium-low speed until combined. Gradually add in the dry ingredient mixture and beat until combined.
  4. Roll the dough into small balls, about 1-inch in diameter. Fill a small bowl with sugar, and roll each ball in the sugar until it is completely coated. Place on cookie sheet at least 1 inch apart, and bake for about 8-10 minutes, until the cookies begin to slightly crack on top. (They may crack more while cooling.) Remove from the oven and let cool for a minute or two. Then transfer to wire racks to cool completely.
  5. Serve immediately or store in a sealed container for up to 1 week.
Recipe Source: slightly adapted from my Grandma Rice (butter instead of shortening)

Pumpkin Cream Cheese Muffins

$
0
0

Pumpkin Cream Cheese Muffins

Hello sweet friends!  Are you enjoying your Fall so far?  On my last post I mentioned that it was finally getting chilly here in the South, well that is no longer the case!  I think Mother Nature is being very tricky this year!  We have actually been breaking records here in Chattanooga this last week.  It was 85 yesterday, a new hottest November day on record for us!  I  have to admit that I find this irritating, especially when I keep trying to wear my normal Fall wardrobe favorites of long sleeves and boots.   I guess I can’t be too mad though, because it really is GORGEOUS here with all the Autumn colors.  I love it, and I am holding out hope that the elusive ‘chill in the air’ will come soon!  Oh well, at least the heavy humidity is gone, and trust me, that is something to cheer about!  Even though may it may feel like summer outside,  I have not let it stop me from baking some favorites for this time of year, including these wonderful Pumpkin Cream Cheese Muffins.  These are amazing and they make your house smell incredibly fall-ish!  These babies are definitely ‘taking it up a notch’ kind of muffins.  They are a bit more work with the cream cheese filling and the crumb topping but totally worth it!   You will love them!

PS I had several emails asking about our email sign up.  For some reason it was missing off our sidebar, but it is back now!

Pumpkin Cream Cheese Muffins
Author: 
Serves: 24 muffins
 
Ingredients
For the filling:
  • 8 oz. cream cheese, softened
  • 1 cup powdered sugar
For the muffins:
  • 3 cups all-purpose flour
  • 2 teaspoon ground cinnamon
  • 1 teaspoon ground nutmeg
  • 1 teaspoon ground cloves
  • 1 teaspoon salt
  • 1 teaspoon baking soda
  • 4 large eggs
  • 2 cups sugar
  • 1 15 ounce can of Pumpkin puree
  • 1¼ cups vegetable oil (I use ½ cup applesauce and ¾ cup oil)
For the topping:
  • ⅓ cup brown sugar
  • 5 tablespoons flour
  • 1½ teaspoons ground cinnamon
  • 4 tablespoons cold unsalted butter, cut into pieces
Instructions
To prepare the filling:
  1. Combine the cream cheese and powdered sugar in a medium bowl and mix well until blended and smooth.
To make the muffins:
  1. Preheat the oven to 350 degrees F. Line muffin pans with paper liners. In a medium bowl, combine the flour, cinnamon, nutmeg, cloves, salt and baking soda; whisk to blend. In the bowl of an electric mixer combine the eggs, sugar, pumpkin puree, applesauce (if using) and oil. Mix on medium-low speed until blended. With the mixer on low speed, add in the dry ingredients, mixing just until incorporated.
To make the topping:
  1. Combine the sugar, flour and cinnamon in a small bowl; whisk to blend. Add in the butter pieces and cut into the dry ingredients with a pastry blender or two forks until the mixture is coarse and crumbly.
To assemble the muffins:
  1. Using a cookie scoop or spoon, fill 24 muffin cups with a small amount of batter, enough to cover the bottom of the liner (2 tablespoons). Using a smaller mini scoop, or small spoon place about a tablespoon dollop of the cream cheese mixture in the center of each muffin cup. You want to put the cream cheese in the lower portion of the muffin because it will rise during the baking process. Divide the remaining pumpkin batter evenly among the muffin cups, covering the cream cheese completely. Sprinkle a small amount of the crumb topping mixture over each of the muffin.
  2. Bake for 20-25 minutes. Transfer to a wire rack and let cool completely before serving. They are excellent to serve warm, cold, or at room temperature.

Recipe Source: adapted from Annie Eats

Favorite Christmas Recipe Round Up

$
0
0

Merry Christmas sweet friends!

Can you believe it is less than a week until Christmas?!  I am so excited!  I have a couple of little things left to get but then I am DONE and can focus on fun at home!  I am especially looking forward to some kitchen time, making our favorite holiday recipes with my boys.  I thought I would share my list of favorite Christmas recipes with you today, in case you wanted to add a few to your list too!

Candy:

Grandma’s Famous Caramels


Oreo Truffles

Triple Chocolate covered Nuts

Pretzel Rolo Treats (my little boys favorite–we make them gluten free)

Almond Roca /English Toffee (my favorite recipe coming soon)

Cookies:

Gingersnaps (I normally use my gingersnap recipe for gingerbread men)

Eggnog Thumbprints

Twix Cookies (coming soon)

Favorite Sugar Cookies (including an awesome Gluten Free one, recipe coming up)

Baking:

Eggnog Muffins

Cinnamon Rolls (gifting to neighbors)

Appetizers:

Buchanan Cheese Ball

Sweet Cherry Cheese Ball (trust me on this one–even if you don’t like marshino cherries–you will love this!)

Christmas Dishes:

Christmas Eve Egg Nog (this is a tradition that we all look forward to–it is the BEST served in a chilled punchbowl over scoops of vanilla bean ice cream!)

Chicken A La King (served in bread crowns on Christmas Eve for Christ the King!)

Christmas Morning Eggs (a little cream works MAGIC on eggs!)

What are you making?  Anything I need to add to my list?


Vanilla Bean Scones (Like Starbucks)

$
0
0

When my sweet parents returned home from serving an LDS mission in New Zealand, they had a big party with gifts for everyone in the family.  For me and my sisters my cute Mom had collected tea sets.  We each got a mismatched set of beautiful, made in England, china tea cups, plates and a tea pot.  I absolutely LOVE these darling dishes.  With a family of boys, it is so fun to have some sweet feminine items around like this (since flowery decor is so rare at my house)!  I have added to the collection, so I have been able to get them out for my book club group from church.  It is so fun!  I love making fresh scones to go with a variety of herbal teas and having a fun evening with my girl friends.

The last time our book club met, I made these Vanilla Bean scones and we all loved them.  I have never had Starbucks vanilla bean scones but I have been told that these are very similar, except they cut them into mini triangles.  The pretty little flecks throughout the scones and in the glaze are the vanilla bean seeds that you get by scraping a split vanilla pod, or you can use vanilla bean paste like I normally do.  I keep a bottle in my cupboard because it is SO much easier and faster than scraping a vanilla seed and right now it is more economical.  Have you noticed how expensive vanilla is recently?!  If you don’t have vanilla beans or the paste, you can use vanilla extract–but it will not be as good and you will be missing the little black flecks.

Be sure to not overcook these scones.  You want them light golden brown, but still moist and tender.

By the way, the newest book we are reading for book club is: ‘Seek this Jesus’ by Neill Marriot.  I just finished it and LOVED it!  What a beautiful , down to earth book.  It is short, easy to read and so inspiring!
My other book club is reading ‘The Zoo Keepers Wife’ which I am currently listening to on Audible and LOVE it too.  I love historical novels.    What are you reading??  I would love some recommendations!

xoxo

One Year Ago: Thai Curry Meatballs
Three Years Ago: Grandma’s Cinnamon Buns
Five Years Ago: Heart Shaped Carrots for Valentines Day
Seven Years Ago: Lindt Truffle Chocolate Cupcakes
Nine Years Ago: Ham Bone Bean Soup

Vanilla Bean Scones
 
Ingredients
  • 2 cups all purpose flour
  • ⅓ cup sugar
  • 1 Tablespoon baking powder
  • ½ teaspoon salt
  • ½ cup cold butter, butter into pieces
  • I vanilla Bean, split and seeds scraped out OR 1 Tablespoon vanilla bean paste
  • ¾ buttermilk or whipping cream
  • extra cream or egg wash (1 egg mixed with 1 TB milk) for brushing the tops
Glaze
  • 1 cup powdered sugar
  • seeds scraped from 1 vanilla bean OR 1 Tablespoon vanilla Bean Paste
  • 1½ tablespoons cream or milk
Instructions
  1. Preheat oven to 425.
  2. Stir together first four ingredients in a large bowl or food processor.
  3. Cut butter into the flour mixture using a pastry blender or by pulsing on food processor, until the mixture is crumbly and resembles small peas.
  4. Place mixture in freezer for 5 minutes is it seems warm ( I usually don't need to do this because I start with very cold butter and work quickly).
  5. Add vanilla bean paste, vanilla beans or vanilla to buttermilk and add to dry mixture, stirring until just until dry ingredients are moistened. Turn dough onto baking mat (or marble slab or wax paper) , gently press or pat dough into a 7 inch round (mixture will be very crumbly) Cut round into 8 wedges (or 12 if desired--just cut down bake time a little) Place wedges about 2 inches a part on a parchment or silicone lined baking sheet (or lightly grease first). Brush tops with whipping cream or egg wash. Bake at 425 for 13-15 minutes until golden brown.
Recipe Source: The Sisters Cafe–a simple variation of my favorite scone recipe found here

Nutella Swirled Banana Bread

$
0
0

Did you know that a jar of Nutella is sold every 2.5 seconds?! And that approximately 1.35 million pounds of Nutella are produced every day!!  Crazy, right?
It all started with a chocolate shortage during World War II. When chocolate was rationed it became a rare, pricey commodity so founder Pietro Ferrero added hazelnuts to extend the cocoa supply and Nutella was born!

For years, Nutella was free for Italian children. Shops all over Italy honored a BYOB (bring your own bread) policy where kids could bring in their own slice of bread and get a complimentary spread.  Nice!

I know my boys would never leave the house without a piece of bread–haha! We are big fans of Nutella at our house, thats for sure!  It is GLUTEN FREE (yeah!!) and incredibly tasty on anything from toast to pretzels (my personal favorite)!  Last week I tried to add it to some banana bread and …oh my…it was DELISH!  I actually whipped a gluten free loaf up too for my boys with Celiac disease.  We all LOVED the addition of Nutella!

I put a few slices in the freezer to send with my husband for a quick breakfast on the go and to slip in my boys school lunches. This was a big hit with my family and fun little spin off on classic banana bread.  It is always fun to change things up and you know you can’t go wrong with Nutella!

What are your favorite ways to eat Nutella?

If you need any ideas…I have a couple of suggestions for you!

Have you tried…

Peanut Butter and Nutella Cookies? 

3 ingredient Nutella Fudge Brownies?

Nutella Hot Chocolate?

Nutella Banana “Ice Cream”?

or slathered inside these Creme Filled Crepes?

Am I missing any fabulous ways to enjoy Nutella?!  If so …please share!!

Did you know you can subscribe to the Sisters Cafe (sign up on the right sidebar)?  You will get an email notification with a link to the latest recipes posted!  I would LOVE to add you to my list!!  You can be the first to know what I have cooked up to share!

Happy Friday sweet friends!  I hope you have a wonderful weekend!

xoxo

Melanie

Nutella Swirled Banana Bread
 
Ingredients
  • 2 cups all-purpose flour
  • ¾ tsp. baking soda
  • ½ tsp. salt
  • ¼ cup butter, at room temperature
  • 1 cup granulated sugar
  • 2 large eggs
  • 1¼ cups mashed ripe banana
  • ⅓ cup buttermilk, milk, sour cream or plain yogurt
  • 1 tsp. vanilla extract
  • ¾ cup Nutella
Instructions
  1. Preheat oven to 350 degrees. Spray 9 x5-inch loaf pan with nonstick spray.
  2. In a medium bowl, whisk together flour, baking soda & salt.
  3. In a separate large bowl, beat sugar and butter with an electric mixer at medium speed until blended.
  4. Add eggs, one at a time, beating well after each addition. Add banana, milk and vanilla. Mix until blended.
  5. Add flour mixture, beat at low speed just until flour is incorporated but DO NOT OVERMIX!
  6. Spoon Nutella into a small dish and soften in the microwave for about 15 seconds. Add 1 cup of the banana bread batter to the Nutella and stir until blended well. Spoon Nutella batter alternately with plain banana bread batter into the prepared pan. Swirl batters together with a knife.
  7. Bake 55-60 minutes, or until a toothpick comes out mostly clean. Cool for at least 15 minutes in the pan, and then turn out onto a wire rack to cool completely.
recipe adapted from Nutella Everyday

Source of interesting Nutella facts: Uselessdaily.com

Viewing all 10 articles
Browse latest View live


Latest Images